



Control Resonant Power Lines Oyun Rehberi: Tüm Metro İstasyonları ve Kalibrasyon Bulmacaları










 PlayStation
 Steam
Steam Xbox
XboxPower Lines is the mission where Control Resonant swaps combat for puzzles. Three subway stations need their power rerouted for the CFD, each one gated behind a calibration puzzle, and the tunnels are full of a new enemy family that will humiliate you if you arrive without the right damage type. There is also a missing FBC crew, and finding out what happened to them is optional but hard to ignore once it starts.
Power Lines Quest Overview
This is the fourth mission of the Contain the Crisis chapter, unlocked alongside Into the Sinkhole after Arish's Briefing. The two run in parallel and can be taken in either order.
Chapter | Contain the Crisis |
Starting location | Central, subway stations around Central and The Park |
Requirement | Complete Arish's Briefing |
New enemies | Mold Scrapper and other Mold types |
Tracked under | Notes: Plan of Attack |
Sub-objective | Help the Survivors |
The campaign order across all three chains sits in the Control Resonant Walkthrough Hub. Both this and Into the Sinkhole feed the Plan of Attack tracker, and Control Resonant Arish's Briefing Walkthrough covers the conversation that unlocks them, along with the case for detouring to a Resonant first.
Which Stations You Need to Reroute

Three stations carry the mission:
- Perimeter Station, Quest Area 1, southeast of the Field Office
- East Park Station, Quest Area 2, east of Perimeter
- Factory Station, Quest Area 3, north of East Park
The map numbers them one to three, and this walkthrough follows that order, starting at Perimeter. There is no mechanical benefit to a different order, though Perimeter is closest and has the gentlest puzzle.
A fourth station, Vanished Station, appears in quest summaries for Power Lines. It is not part of the three-station reroute described here, and its route is not covered below.
How the Calibration Puzzles Work

Every station runs the same system, so understanding it once covers all three.
Each subway platform holds a Tuning Device and a set of leyline convergence points, marked as yellow squares on the floor. You need to find three portable Calibration Units in the station, place them on the correct convergence points, and pull the lever on the Tuning Device. A red screen turns green if you got it right.
The difficulty is that you are not told which convergence points are correct. Each station leaves a clue in a note called Notes on Calibration, written by the FBC agents who tried this before you. Read the note before touching anything, because the clue is the entire puzzle.
Getting it wrong is not fatal. The Tuning Device simply fails to activate, and in at least one station a wrong configuration triggers a side effect rather than a penalty.
On the solutions. The exact convergence points for each station are published behind spoiler tags in the sources available while writing this, so the specific squares are not reproduced here. What follows explains how to read each station's clue and where all three Calibration Units are, which is the part that takes time. The final placement is a short process of elimination once you have the units in hand and the note read.
Reroute Perimeter Station

Perimeter Station is southeast of the FBC Field Office, but the direct southeastern street is blocked the first time you approach.
The way through is the Park route. Look for the blue sign outside the Field Office with an arrow pointing toward the Park, and follow the signs until they turn you right toward a set of double doors on a brick building. The doors need Level 1 clearance, which you have from Welcome to Manhattan.
Inside is an Arena Encounter alongside FBC rangers. Clear the Heavies, leave the building, and continue to the intersection with an Orientation Point, which puts you just north of the objective.
Head south, following the sign on the cement barricade pointing to a PATTERNED AREA. On the left side of the street is a store called Urban Fresh Mart with a Resource Crate in the back corner.
Two station entrances sit near the end of the street, marked by pairs of green lamps. Approaching triggers an Arena Encounter, and the station stays sealed until it is cleared. Prioritise the healing Hiss Clusters, then the Heavies.
Inside Perimeter Station

On the way down you can report the mass of blue Mold blocking a hallway. Zoe explains the teams have been burning it back without much success, and tells Dylan not to eat any, which makes more sense later.
Past the next Orientation Point is an area with vending machines and an active Power Core Station. There is a Resource Crate behind a locked door here: hit the active core near the open door leading to a store, carry the charge across, and hit the inactive core to open it.
Follow the yellow line down to the platform. The Tuning Device sits in the centre, unpowered.
Read the clue first. The instruction sheet is near the desk by the Tuning Device, and a foldable chair across from it holds Notes on Calibration. The note reports a good response from the spot closest to the Tuning Device, and the same response from a couple of the spots farthest from it. Those two observations are your whole answer.
Calibration Unit 1 is at the top of the stairs opposite the ones you came down, next to a convergence point by the mold-blocked hallway. Given the clue, leaving this one where it stands is worth considering before you pick it up.
Calibration Unit 2 is down the mold-covered tunnel, on the platform next to a Maintenance Recording.
Calibration Unit 3 is behind a locked door down the tunnel opposite the second unit. Return to the stores upstairs, take the charge from the active Power Core, and dash down the tunnel to the inactive core before it drains. The door opens, and the unit is inside.
With all three in hand and the note read, place them and throw the lever on the Tuning Device. Green screen means Perimeter is online.
Reroute East Park Station

East Park Station is east of Perimeter, next to a gas station. The entrance is sealed by resonance, so kill the Hiss Heavies guarding it, then descend.
The stairs down pass more Mold blockades and a security gate before opening into a wider area. Turn right for a store with a Calibration Unit sitting in plain sight. On the opposite side is another store sealed by a shutter with the second unit inside, which you cannot reach yet.
Take the unit downstairs to the platform. The Tuning Device is here, along with convergence points buried under writhing clumps of Mold. The third Calibration Unit is on the platform past the device.
Clear the Mold off the convergence points first. Each clump takes a single hit.
Read the clue. The table near the Tuning Device holds another instruction sheet and a second Notes on Calibration, this one written by a different agent. It reports that using the device has been causing physical transposition, which is a formal way of saying it teleports people to elsewhere in the station when it is set up incorrectly.
That is the clue and the failure state at the same time. This station has only three convergence points and one of its units starts locked behind a shutter, which narrows the problem considerably compared to Perimeter.
Once the units are placed and the device activated, return to the Tuning Device and throw the lever.
Reroute Factory Station

Factory Station is north of East Park. If you travel directly north, watch the road for mines.
Head north until the street disappears under a mass of blue Mold at an intersection. The Urban Fresh Mart on the southern corner of that intersection holds both an Arcade Cabinet and a Resource Crate, which is the only place in the mission where both appear together.
Travel west from there to the next intersection, where the Factory Station entrance sits. Someone else got here first, and a group of Hiss Heavies is already fighting Mold enemies over the ground.
Clearing the Mold Heavy waves removes the barricade and opens the station.
A note on coverage. The material available for this walkthrough runs out at the descent into Factory Station. The section below on Mold enemies applies to this fight and everything past it, but the Factory Station interior route, its Calibration Unit locations, its Notes on Calibration clue and the mission's closing sequence are not documented here. Treat the two stations above as complete and Factory as partial.
Mold Enemies and Why You Want Fire

Mold enemies are not Hiss, and they do not behave like them.
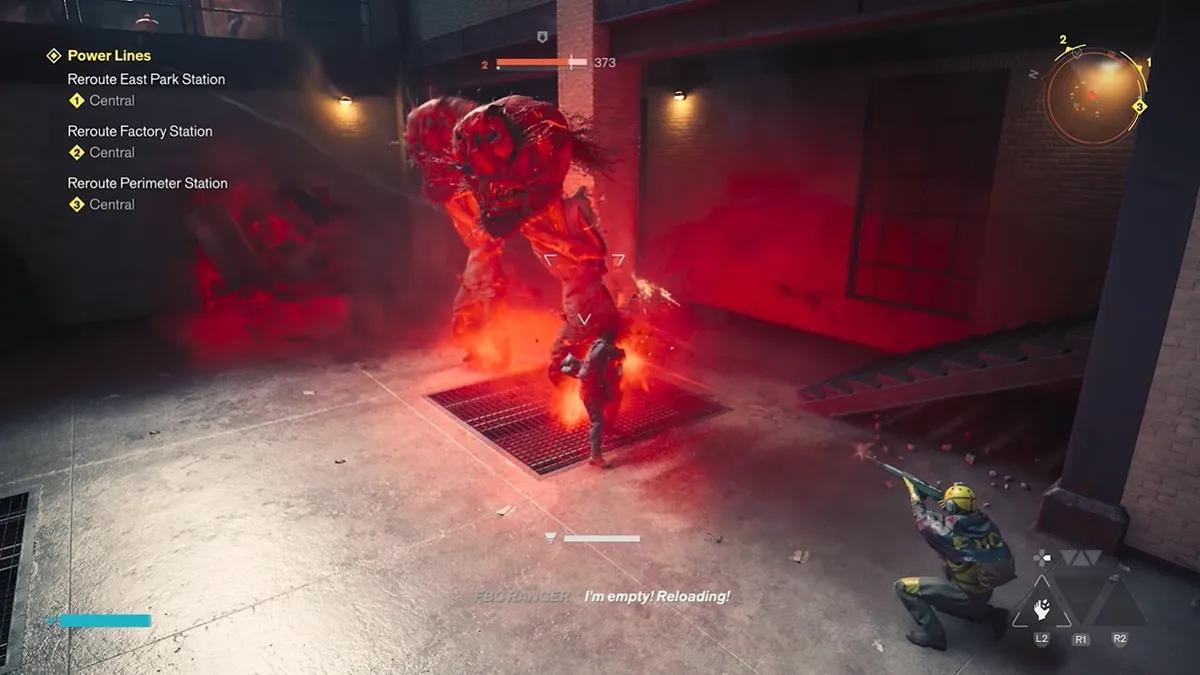
The Mold Scrapper is the large variant. It spits mold spores that fill a damage-over-time gauge, it is armored, and it hits considerably harder than the Heavies you have been clearing. Armor has to be broken before you can damage health, which is the same rule as the armored Hiss from Evacuation Procedures.
The difference is that Mold is also weak to fire, and fire is not something you have by default. If your Combat Abilities are all Blunt, this mission gets substantially harder from Factory Station onward.
The fix is the Central Resonant. It sits at the Patterned Factory just south of Factory Station, and beating it lets you pick between two fire-based Combat Abilities. Either one solves the problem, so take whichever suits how you already fight. Detouring for it before the third station is the difference between a mission that flows and one that stalls.
Spoiler warning. The section below covers what happened to the FBC crew that came down here before you, including the resolution of the Maintenance Recordings and the Help the Survivors sub-objective. Skip ahead if you would rather piece it together yourself.
What Happened to the Missing Crew

Each station hides a series of Maintenance Recordings left by agents Sandra Ryder and Clarke. They are optional, they are not required for mission completion, and they carry the only real narrative in Power Lines.
Recording #1, on the waiting bench at the Perimeter Station platform, introduces the pair. Sandra is documenting the reroute attempt partly for the record and partly because she thinks it might make a film one day. Clarke is not enthusiastic.
Recording #2 is down the mold-covered tunnel at Perimeter, near the second Calibration Unit.
Recording #5 is on the East Park platform bench, and it is where things turn. Sandra reports the transposition problem before the device takes her mid-sentence. Clarke manages to bring her back, but not intact: something happened to her leg. They run the teleport again to put her right, and she comes back sounding wrong.
Recording #6 is left of the bottom of the East Park staircase, further from the platform entrance. Clarke tries to continue the logs Sandra started. He is uninterested and distracted throughout.
Dr. Florez and Help the Survivors

A voice calls for help as you climb the stairs out of Perimeter Station. The speaker box on the wall connects to nothing but static on the first attempt.
The second attempt, at the top of the East Park stairs, goes through. Dylan speaks briefly with Dr. Florez before Burt Clarke takes over the call and reports that his partner did not make it. You can ask about Sandra. He does not answer.
Finishing that conversation unlocks the sub-objective Help the Survivors, which asks you to locate and rescue the civilians trapped in the subway tunnels. Dylan reports it to Zoe, and the details land in the Quest Log.
Dr. Florez is not optional in the long run. You will meet her before the mission can be completed, whether or not you use the intercoms along the way. The intercoms only fill in the middle.
Collectibles and Recordings
Item | Station | Where to find it |
|---|---|---|
Notes on Calibration | Perimeter | Foldable chair across from the instruction sheet |
Maintenance Recording #1 | Perimeter | Waiting bench on the subway platform |
Maintenance Recording #2 | Perimeter | Down the mold-covered tunnel |
Resource Crate | Perimeter | Urban Fresh Mart, back corner, street level |
Resource Crate | Perimeter | Behind the locked door near the vending machines |
Notes on Calibration | East Park | Table near the Tuning Device |
Maintenance Recording #5 | East Park | Platform bench |
Maintenance Recording #6 | East Park | Left of the bottom of the staircase |
Resource Crate | Factory | Urban Fresh Mart at the mold intersection |
Arcade Cabinet | Factory | Same Urban Fresh Mart |
Recordings #3 and #4 are not covered above. Given where the numbering falls, they are likely split between the Perimeter and East Park tunnels or held in Factory Station.
Power Lines Rewards
The mission reward for Power Lines is not documented in the material available here. What it definitively unlocks is progress on the Plan of Attack tracker and the Help the Survivors sub-objective, and it is one of the permanent autosave points the game creates after every main mission, which matters if you later need to reload to chase a choice-based trophy.
Common Mistakes
Picking up the first Calibration Unit at Perimeter without reading the note. The clue specifically mentions the spot nearest the device and the spots farthest from it, and one unit already sits on a convergence point when you find it.
Skipping the Mold off the East Park convergence points. You cannot place a unit on a covered square, and the clumps die in one hit.
Arriving at Factory Station without fire damage. Mold is armored and fire-weak. The Central Resonant is a short detour to the south and hands you a fire ability.
Travelling directly north to Factory Station. That road is mined.
Treating the intercoms as flavour. They are optional, but they set up a sub-objective and a character you have to deal with regardless.
What to Do Next
If you have not run Into the Sinkhole, it is the other half of the Plan of Attack and can be taken at any point. Completing both closes the tracker and moves the campaign toward Enemy of My Enemy, which requires the West Incursion Resonant before it will unlock.
The Search for Jesse chain is also worth keeping current, since each Fault grants a traversal ability that opens routes elsewhere.


 Başarıyla kopyalandı... İçeriğimizi paylaştığınız için teşekkür ederiz!:



100 mücevhere kadar %5 para yatırma bonusu

Para yatırma ve çekme işlemlerinde %0 ücret.





11 Para Yatırma Bonusu + FreeSpin


EKSTRA %10 PARA YATIRMA BONUSU + ÜCRETSIZ 2 ÇARK DÖNDÜRME

Ücretsiz Kasa ve %100 Hoş Geldin Bonusu


5 Ücretsiz Kılıf, Günlük Ücretsiz ve Bonus

3 ücretsiz kasa ve tüm nakit para yatırma işlemlerine %5 bonus eklenir.

Depozitoya +%5




Yorum